Azure Directory roles are used to manage the permissions that can be assigned to users. You can assign roles to users so they can perform certain actions such as resetting user passwords, assigning, or removing licenses, adding or removing users, etc. More than 50+ built-in roles are available in Azure Directory so you can follow the principle of least privilege and assign users the permission that they need to complete the tasks given to them.
Azure Directory roles make sure that the users are not over-privileged or under-privileged with the permissions given to them. For example, if you want to give a user the permission to create/manage groups, create/manage groups settings such as naming and expiration policies, and view groups activity and audit reports, then Groups Administrator is the right role that can be assigned to the user.
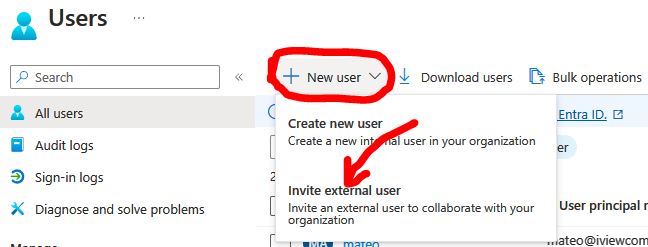
In the “Adding Users” post, we discussed several types of users. If you recall, we talked about Guest accounts (Microsoft accounts and users from external Azure ADs). These users need to be invited to your tenant. Recipients can redeem the invitation and join your tenant for collaboration. In the All Users blade, you have an option to add a new Guest user. Clicking New Guest User will redirect you to a screen similar to the screen shot below.
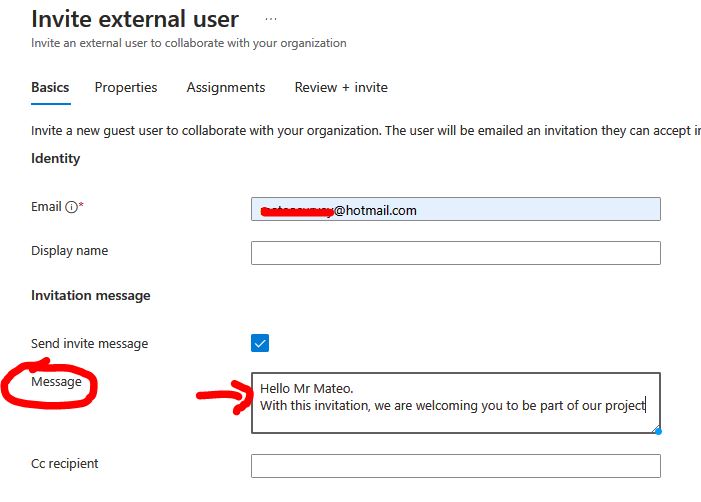
The only email address is the mandatory field, and you can even customize the personalized message. By clicking Submit, this message will be appended to the email invitation, which will be triggered to the recipient, as shown
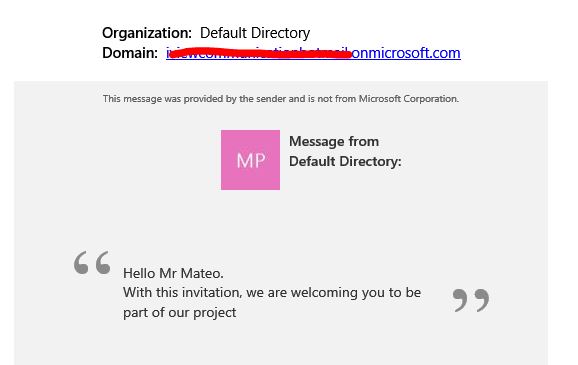
A sample invitation has been added for your reference as the above screenshot. These users can be easily spotted in the All Users blade by looking at the User Type column. You can further add a filter in the blade users in your tenant.
With this example we have invited guest user being part of our new project on Azure.
Basic administrative tasks are limited not only to user management but can include group management as well. In the next post, we will see about what group accounts are and how to create them in Azure directory.
As mentioned in the previous blog post, whenever someone gets promoted, moves to a different department, or changes their work location, these details need to be updated on the user profile.
Though these fields are not mandatory, they will be important in understanding more details about the user. Assume that there are two John Wells in your organization—one works for HR and the other one works for IT. Adding department details here will help the administrator to perform the operations on the right user.
In the next example we are going to modify the user settings we created previously and then delete the user.
Let’s perform the update process on the user we created in the previously. The tasks that we are going to perform here are as follows:
■ Reset the password of the user to a new password. ■ Change the department of the user to HR. ■ Add the employee ID as 1322. ■ Verify the user details. ■ Delete the user. The first step here is to navigate to the All Users blade as we have done in the last post.
You can follow these steps to update the user attributes:
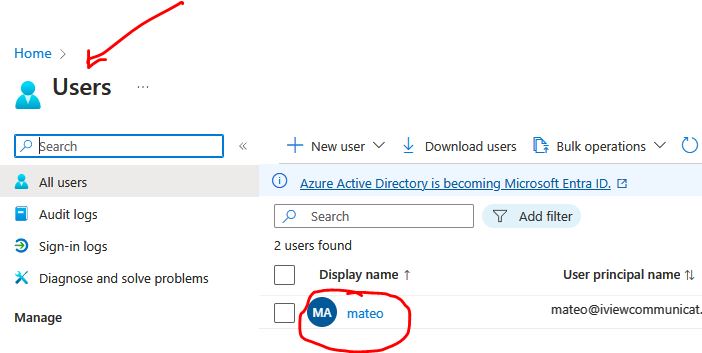
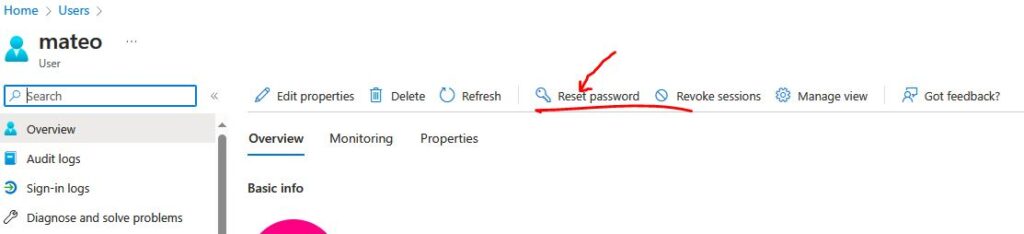
From the All Users blade, select the user Mateo by clicking the name; that will take you to a screen similar to the following one.
Since our first task here is to reset the password, you can click Reset Password, and you will be asked to confirm whether you want to proceed with the reset process. You must click again the Reset Password option, which will be visible in the center top of the screen. To reset a user’s password, you need to be the Global Administrator.
User Administrators, Help-desk Administrators, and Password Administrators can also reset the passwords of non-administrative accounts. However, User Administrators, Help-desk Administrators, and Password Administrators cannot reset the password of a Global Administrator.
Password reset of the Global Administrator can be done only by another Global Administrator.
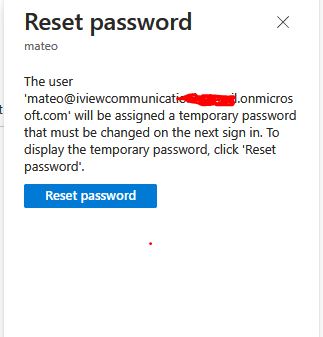
Confirming the reset password option will display a temporary password on the screen. This needs to be changed on the first sign-in after the reset as this is a temporary password and an administrator is responsible for sending this password securely to the user.
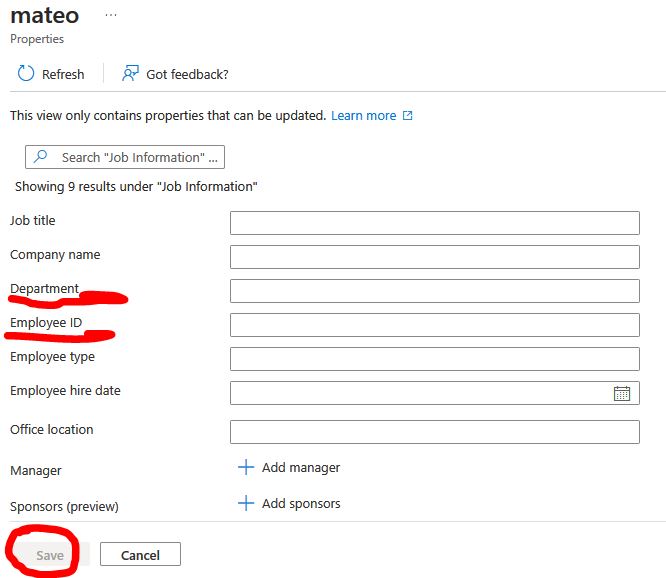
Now that you have reset the password, the next task is to update the department and employee ID.
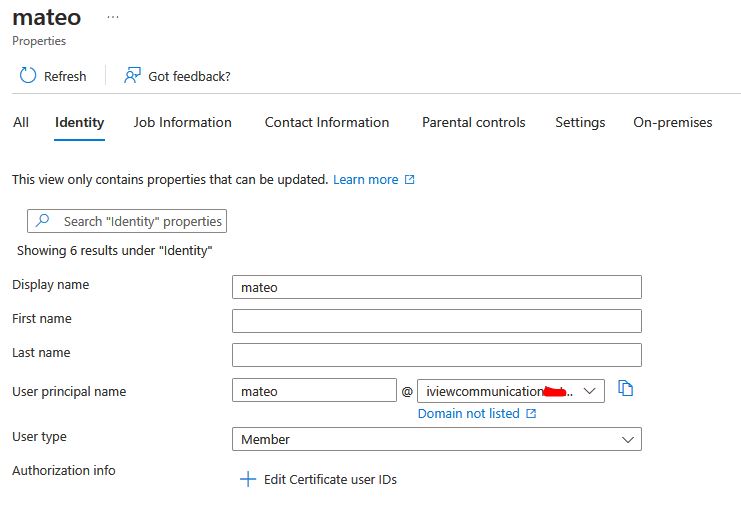
To edit the user details, you can click the Edit properties button, which is on the left side of the Reset Password button.
Clicking the Edit button will enable all the text boxes. Once you have updated the information, you can click Save. You can update all information except the object ID, which is a unique ID assigned to every identity by Azure Identity Management.
Let’s go back to our previous page and click the edit button.
After saving the details, if you go back to user profile, you will be able to see that all the data you entered is populated to the user profile.
Performing these tasks one by one from the portal is not a great idea if you have a large user base. All the actions that you have seen in the previous example can be performed in bulk. In the next section, let’s how administrators can leverage bulk operations available for user accounts.
Bulk Operations In an enterprise environment, new users are added, updated, or deleted in bulk. Performing these actions one by one for each user is a hectic task, and there is a higher chance of human error. You need to automate these tasks and should be able to perform these tasks in bulk. Azure Identity Directory provides bulk operations by which you can create, invite (for guest users), delete, and download users in your directory.
These bulk actions are achieved via uploading a CSV template file, which means a Comma-Separated Values file, which allows data to be saved in a tabular format and contains the details of each user. This file template will be available for download from Azure Portal itself.
In the next exercise, you will use a bulk operation to create nine users (all Avengers characters) in a single shot, and once they are visible on the portal, you will perform a bulk delete operation.
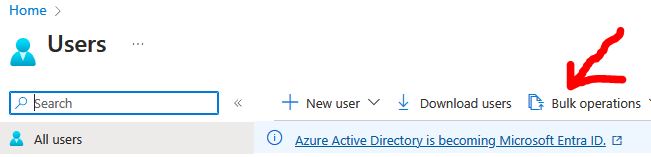
Navigate to the All Users blade.
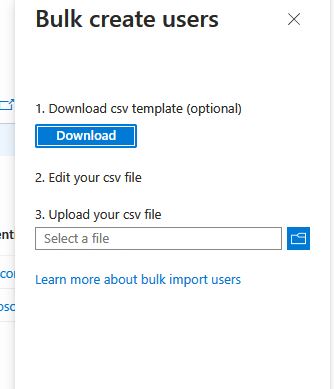
Select Bulk Operations and then select Bulk Create. Selecting Bulk Create will let you download a CSV template. You need to download the template, fill in the details, and upload it to Azure AD for processing. Azure will prompt you with the steps.
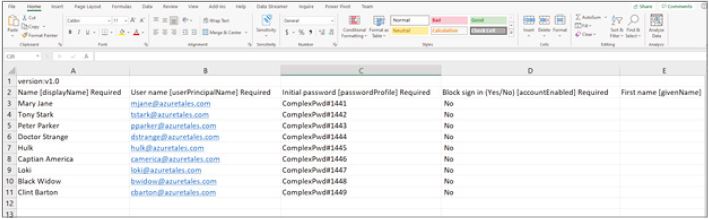
Once the file is downloaded, you can open it in Microsoft Excel and fill in the details. The headers will be auto populated; some of them are required, while some other are optional. The fields that are required will have a [Required] tag in the header. The required fields are Name, Username, Initial Password, and Block Sign In. Fill in the template, as shown here.