In this post we are going to assign access on the resource group level with an account that has owner permissions on the resource group level:
First:
- Navigate to the Azure portal by opening a web browser and going to https://portal.azure.com.
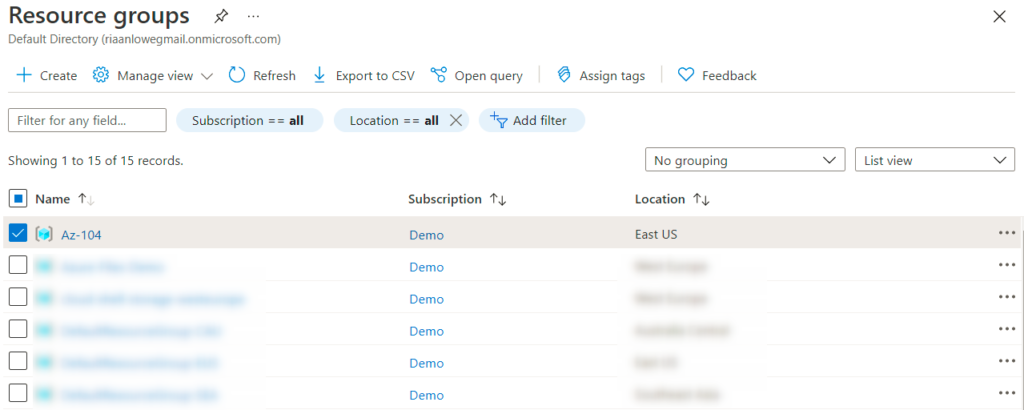
- Select Resource groups on the left, which will show all the current resource groups:

- Select one of your resource groups; if you do not have one yet, you need to create one in any region you want and call it Az-104. In this scenario, I will use one of my resource groups, also called Az-104:
4. Next, go to the Access control (IAM) section, click on Add, and select Add role assignment:
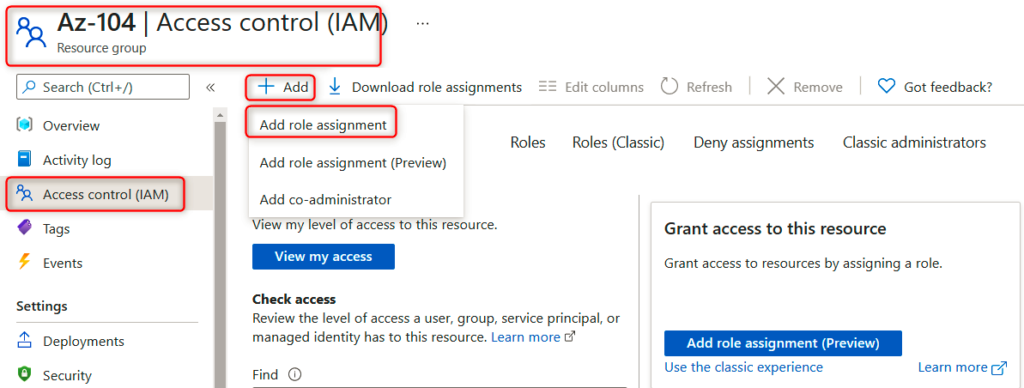
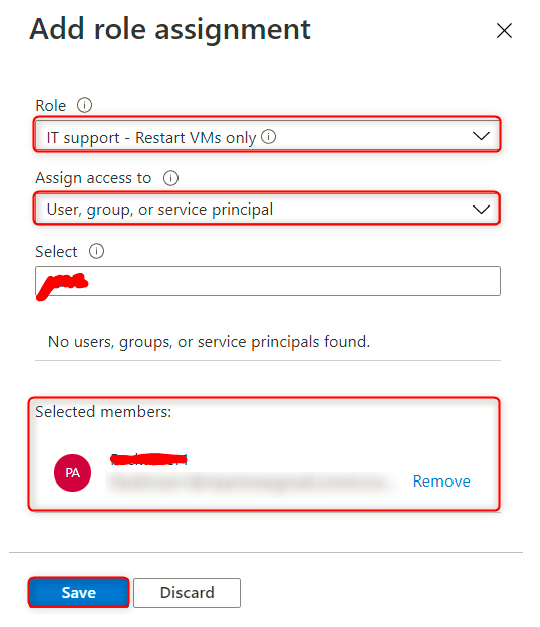
- A new blade opens up; under Role, search for the custom role we created called IT support – Restart VMs only. Under Assign access to, leave it as User, group, or service principal and select a USER you may have created previously and click save.
That’s it – we have now successfully created and assigned a custom RBAC role to a user of your wish.
The final step is to validate the role assignment.
Confirming the role assignment steps
Now that we have assigned a role to a user, let’s go ahead and confirm that it’s working as expected:
- Navigate to the Azure portal by opening a web browser and browsing to https://portal.azure.com (you will need to sign in as the user that you assigned your custom role to).
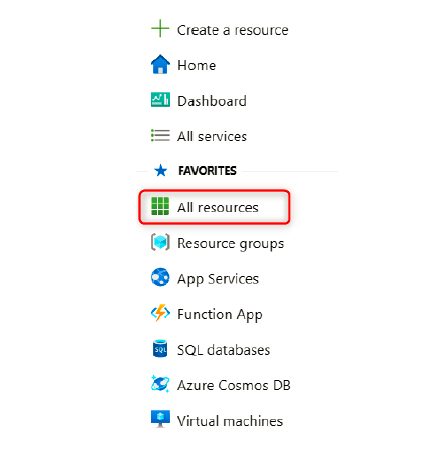
- Select All resources on the left, which will show all the current resource groups:
3. You will be able to see all the VMs listed that are part of the specified resource group:
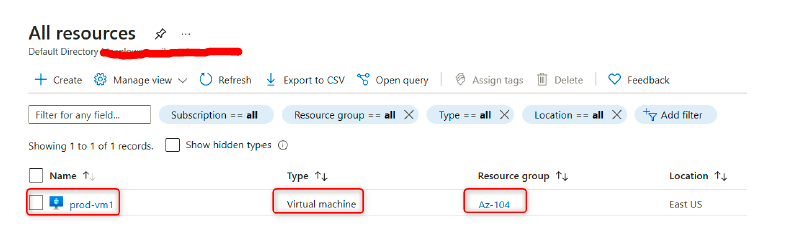
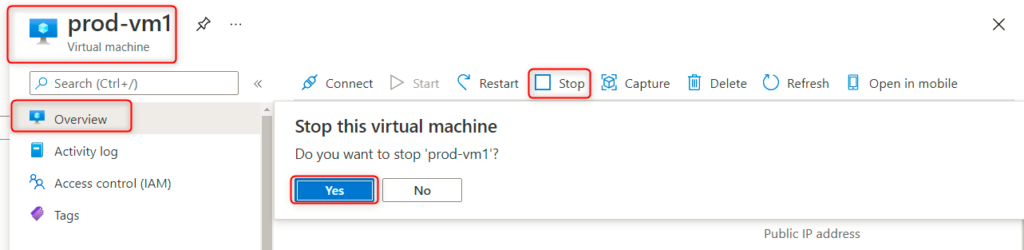
- Select a started VM that is available – in my case, this will be prod-vm1 – and see if you can stop the VM:
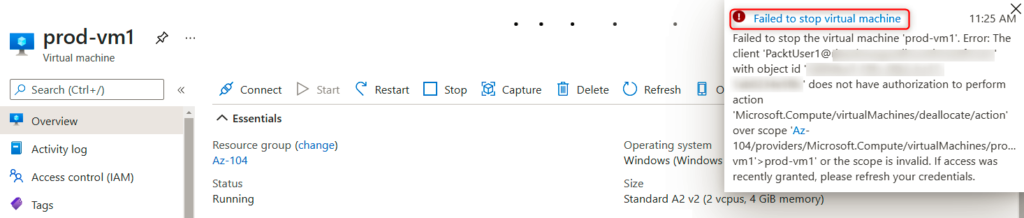
- A pop-up error message will display Failed to stop virtual machine, and that is how we can confirm our custom RBAC role, which denies a user stopping a VM that is working as expected and that only restarting the VM is allowed:
In this post, we looked at how to assign a custom RBAC role via the Azure portal and confirmed that the custom role is applied and working as expected.
Interpreting access assignments
There are a few tips we can provide when interpreting access assignments. First off, you need to understand the scope of the assignment – that is, is it at the management group, subscription group, resource group, or resource level?
Next, you can have a look at the role rules; in order to do this, you need to do the following:
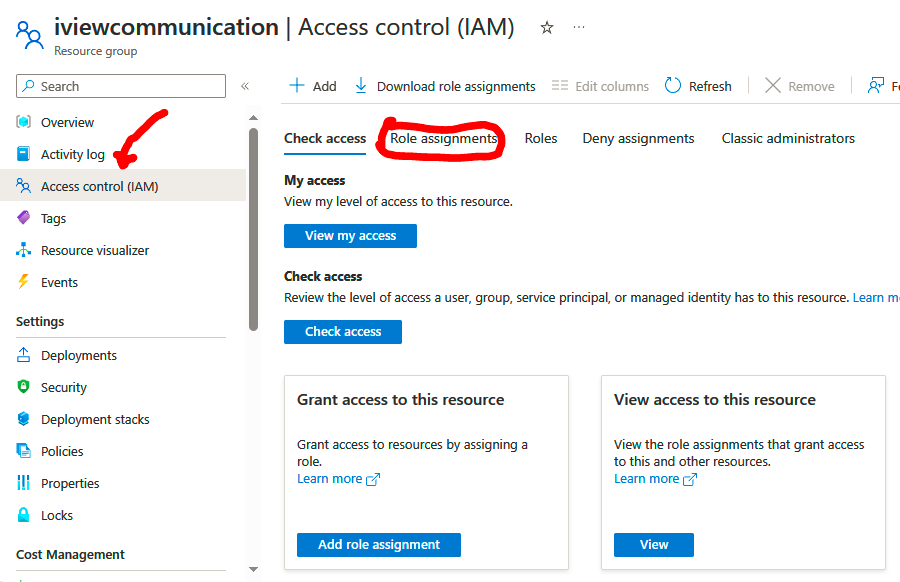
- Navigate to the Azure portal by opening a web browser and browsing to https://portal.azure.com.
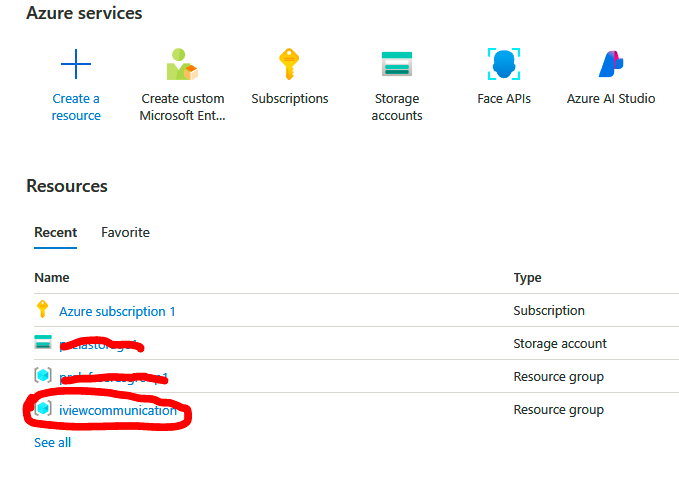
- Select Resource groups on the left, which will show all the current resource groups, and select a resource group in your subscription (in my case, it will be ”Iviewcommunication”).
3.Under Access control (IAM), choose Role assignments and select a role you want to have a look at in detail:
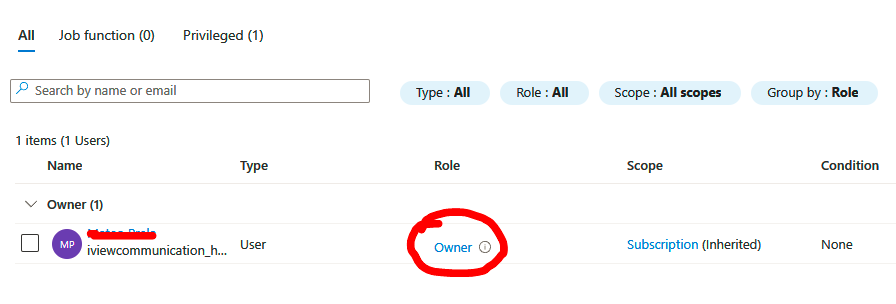
In my case, I’m going to select the owner role:
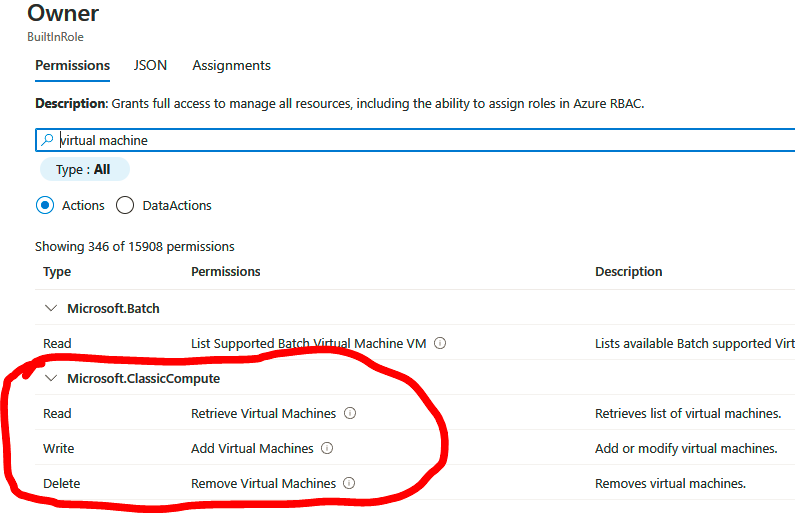
On the next slice we gonna see all the permissions that the owner role can perform. I just have highlighted the most important among the others.
Click on JSON; now, we will be able to view what the role has access to and also what actions are not allowed:

In this post, we discussed what custom roles are, how they work within Azure, and the different scope levels to which RBAC can be applied. We also created a custom RBAC role that only allows a user to restart a VM and not stop it. Finally, we went over how to interpret RBAC role assignments within the Azure portal.