Resource Groups

A resource group is a container used for the logical organization of resources in Azure. These resources may be part of the same solution or based on any grouping that you prefer. Some organizations prefer to keep all services that are part of a solution in a single resource group.
For example, say you are hosting a payroll application that has a virtual machine, SQL database, and storage. You can group these resources so that you can manage the lifecycle of them together.
Some organizations prefer to keep resources of the same type together, for
example, all virtual machines in a single resource group or all databases in a single resource group. This strategy would help them to manage the access to all virtual machines or databases easily.
Resource groups make it easy to deploy, delete, or update resources in bulk. Instead of performing operations on these resources one by one, you could directly perform the action on the resource group, and all resources that are part of the resource group are updated with the action.
Assume you have 135 services deployed to your subscription and now your management is asking you to delete these 135 services. You could select all services from the portal or write a script in PS/CLI to delete the resources. Another easier workaround is to delete the resource group so that all the resources are deleted. This is not an action that is
recommended in a production environment, as this delete action cannot be reversed, and the deleted services cannot be recovered. It’s recommended that you are cautious and vigilant before deleting a resource group.
A resource group contains the metadata about the resources that are part of the resource group. You can have resources from different regions be part of the same resource group; however, the metadata about these resources will be stored in the region of the resource group.
An example is if the location of your resource group is East US and you have a couple of VMs from West US that are part of the resource group. Another is if the East US region is facing an outage and you are making any changes to the VM. Even though the VMs are from West US, the metadata cannot be updated as the East US (region of the resource group)
is facing an outage.
Now let’s see how you can manage (create, list, open, and delete) a resource group from the Azure portal
Creating a Resource Group from the Azure Portal
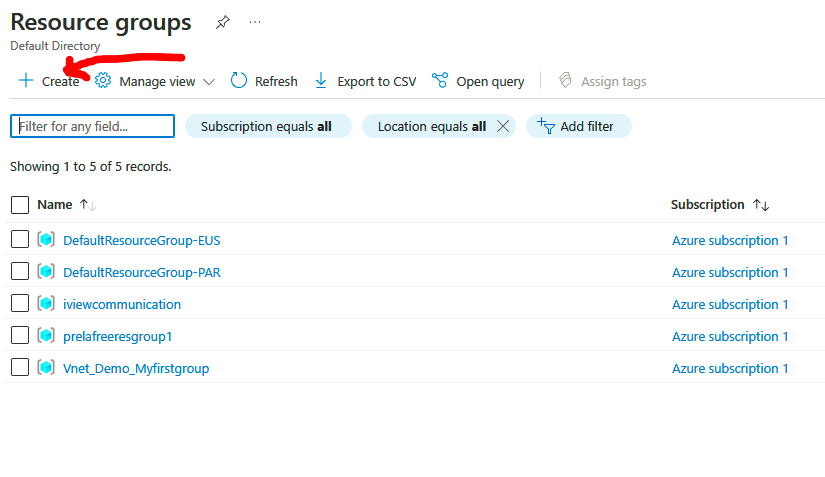
- Sign in to the Azure portal.
- Select Resource Groups and click Create.
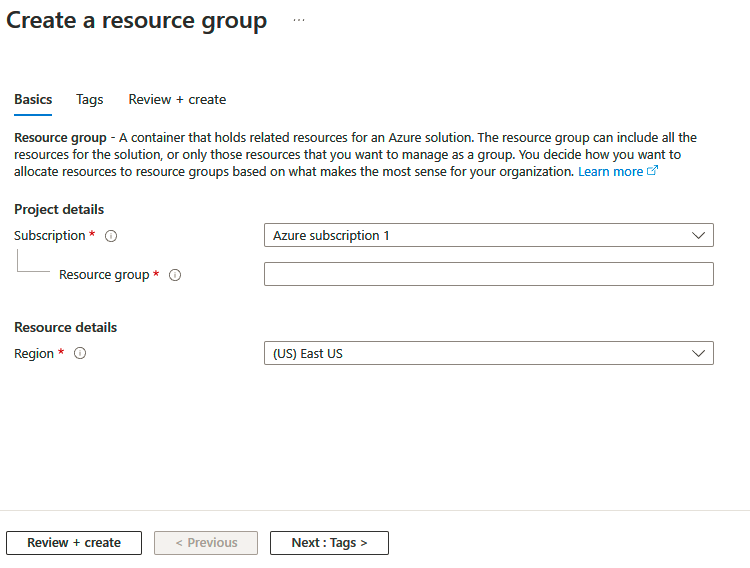
- Input the following values:
Subscription: Select your subscription.
Resource Group: Enter a name for the new resource group.
Region: Select the region for the resource group such as East US, India Central, UK South, etc.
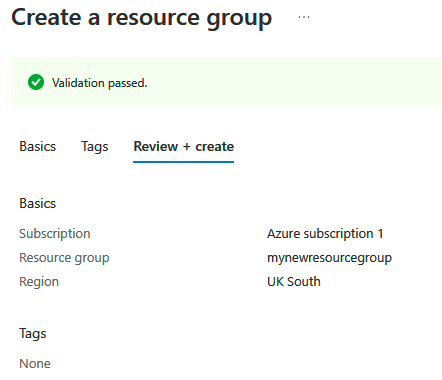
- Clicking Review + Create will take you to the validation phase.
- Once the validation is done, you will see the Create button. Click Create, and your resource group will be created.
Deleting Resource Groups from the Azure Portal
- Sign in to the Azure portal.
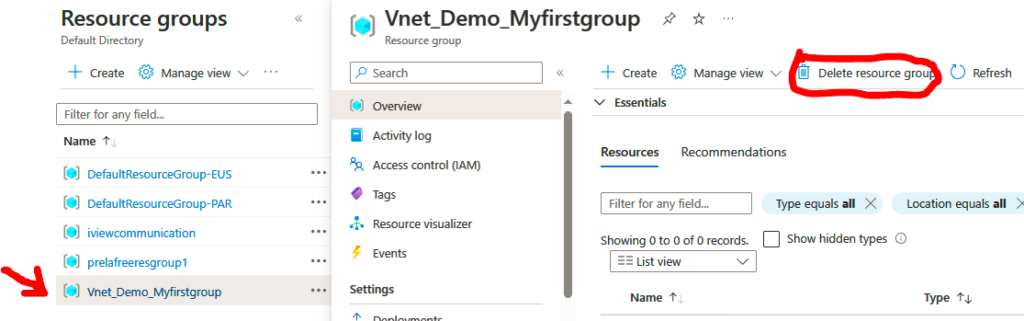
- Select the Resource Groups blade, and you will be able to list all resource groups in your subscription.
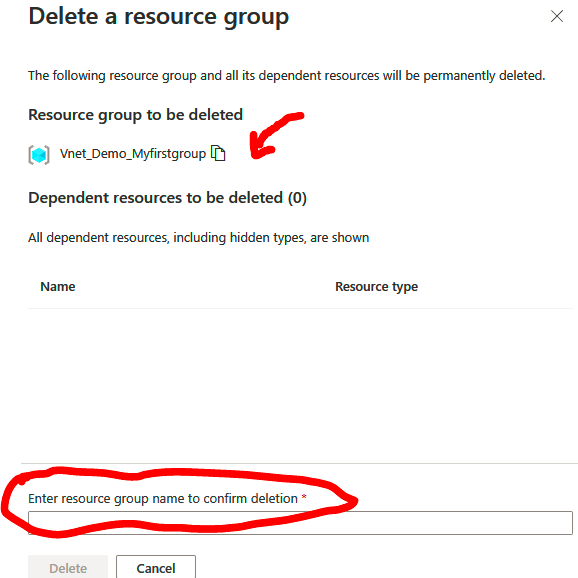
- Open the resource group you would like to delete. Once you are inside the resource group, you will be able to see the Delete Resource Group option that can be used to delete the resource group. You need to enter the name of the resource group to confirm the deletion as this action cannot be undone.
So far, we used the Azure portal to perform the management actions. You can also use Azure PowerShell or the Azure CLI to perform the same tasks. As of now, you can delete only one resource group at a time from the Azure portal. By using scripting, you can perform the management actions in bulk.