This post is focused on managing Role-Based Access Control (RBAC), and we’ll see what RBAC is and how to apply it at the different scope levels. We will also cover how to create and assign custom RBAC roles and how to interpret RBAC roles within the Azure portal.
In brief, the following topics will be covered in this chapter:
- Creating a custom role
- Providing access to resources by assigning roles at different scopes
- Interpreting access assignments.
Creating a custom RBAC role
RBAC is a general term used for restricting access to users, based on a role. It works on the Just Enough Access (JEA) concept where a specific user/group will be provided minimum access to perform their specific job on a specific resource. Custom roles can only be created and updated by a user who has the following role assigned: Microsoft. Authorization/roleDefinitions/write permissions.
When it comes to RBAC, it is very important to understand how and where it is applied. Azure RBAC can be applied to the following security principals:
• User
• Group
• Service principal
• Managed identity
Now that we know what security principals support RBAC, the next step is to have a look at role definitions. A role definition is a collection of permissions that can be applied to security principals; however, in Azure, this is referred to as a role. A role is what determines what operations are allowed – for example, read access, write access, or the deletion of resources.
The following are some built-in roles within Azure:
• Owner role: This is the role that includes all permissions; you can read, add, and remove resources. You also have the capability to add and remove other users to and from resources as owners or other roles.
• Contributor role: This role has the same permission as an owner, except you cannot add or remove additional users to and from resources.
• Reader role: This role has the ability to view resources, but cannot amend, add, or remove users or resources.
Moreover, there are multiple built-in roles within Azure, and it is recommended that you have a look at them: https://docs.microsoft.com/en-us/azure/role-based-access-control/built-in-roles.
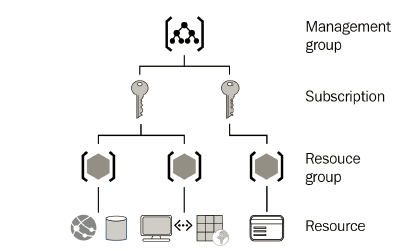
The next part is to understand scope. Scope is the target resource that you need to assign a role to. In Azure, there are mainly four scope levels that roles can be assigned to:
• Management group
• Subscription
• Resource group
• Resource
The following diagram displays the main scope levels in Azure:
In summary, RBAC consists of three main sections:
• Security principal: Selects who is going to have access
• Role: Selects what type of access is going to be assigned to the security principal
• Scope: Selects the resource that the user and the role will be applied to
Now that we understand built-in RBAC roles within Azure, let’s take a look at custom RBAC roles. Custom RBAC roles can be created if the built-in RBAC roles do not meet specific requirements.
Custom RBAC roles can be created in the following ways:
• The Azure portal
• Azure PowerShell
• The Azure CLI
• The REST API
In this section, we had a look at RBAC in Azure and how it works from a logical perspective.
let’s see how to create a custom role.
Creating a custom role
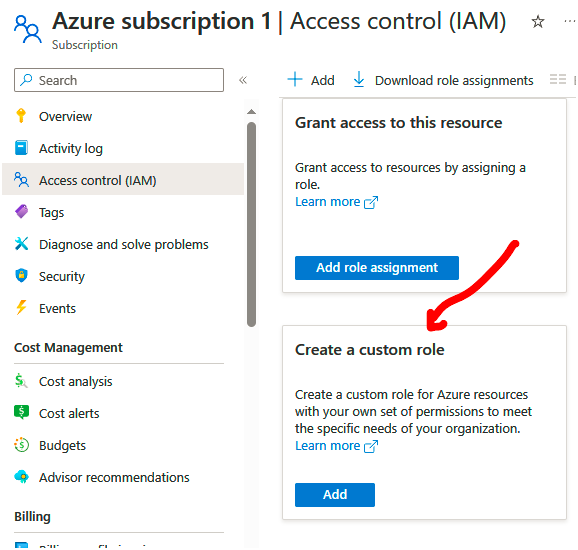
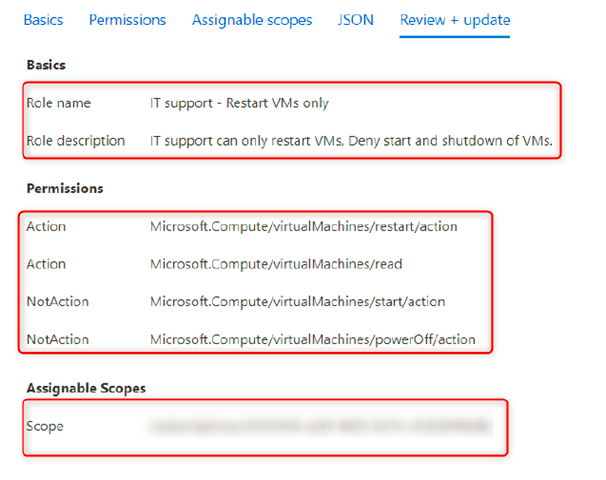
Let’s go ahead and use the Azure portal to create a custom RBAC role from scratch named IT Support – Restart VMs only, which can only restart virtual machines and deny the startup and shutdown of them:
1. Navigate to the Azure portal by opening a web browser and browsing to https:// portal.azure.com.
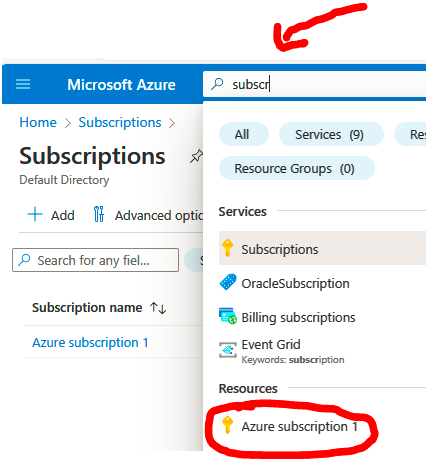
2. In the top section search bar, search for and select Subscriptions:
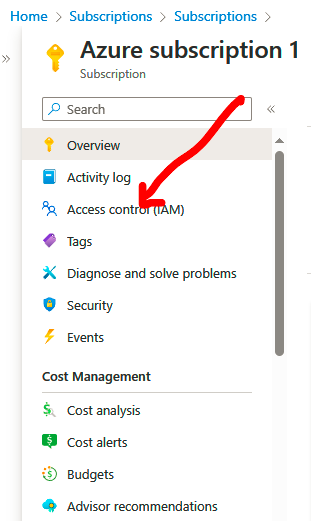
3. Select an active subscription; in my case, this will be the Azure subscription 1 subscription, as seen in the following screenshot and click on it:
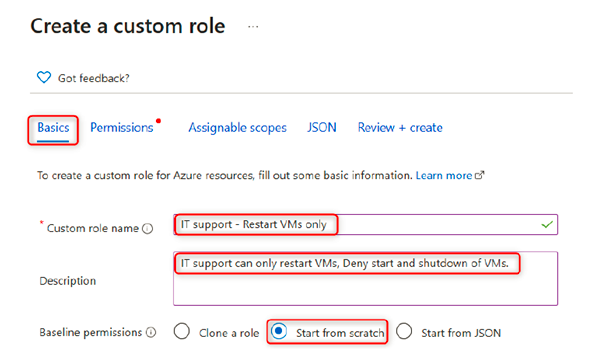
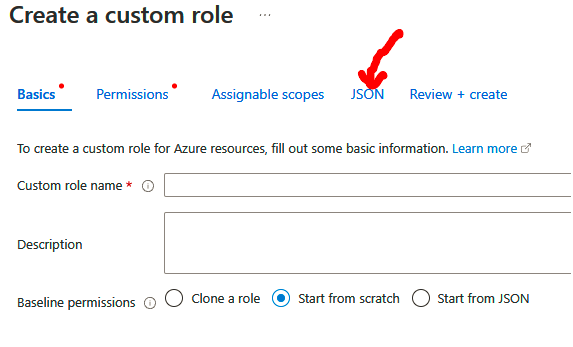
4. Next, under the Basics tab, enter the custom role name and description and select the Start from scratch setting under Baseline permissions. Under Custom role name, specify IT support – Restart VMs only; it is also best practice to provide a brief description in the Description field when creating resources in Azure:
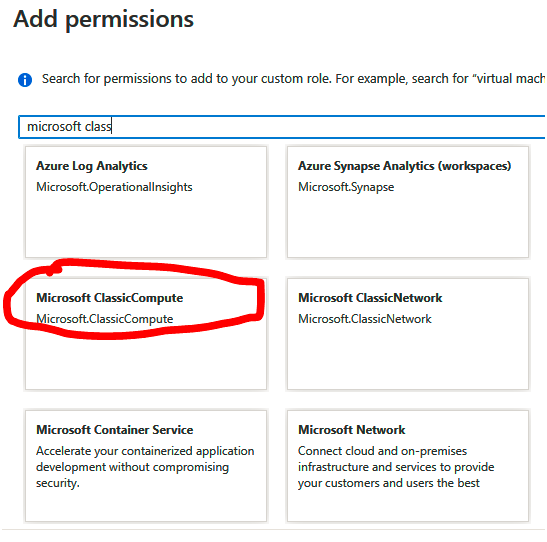
5. Next, we need to specify the permissions. Click on the Add permissions button, and in the search bar that pops up, search for Virtual machines and select Microsoft Classic Compute:
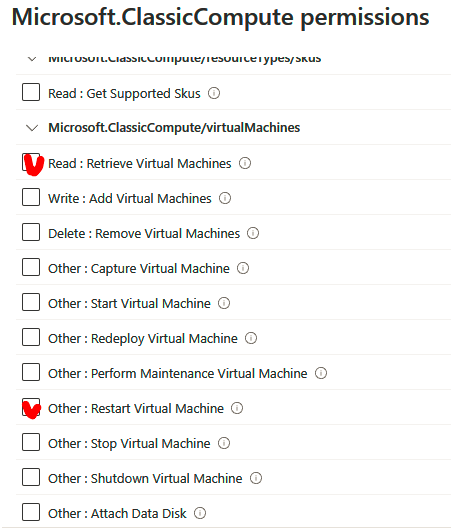
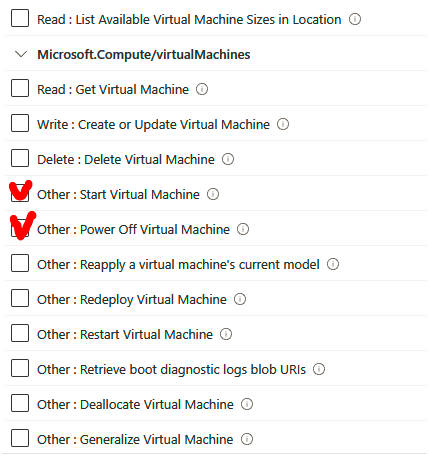
6. A new blade will pop up with all the compute permissions. Scroll all the way down to Microsoft.Compute/virtualMachines and select Read: Get Virtual Machine and Other: Restart Virtual Machine, and then click Add:
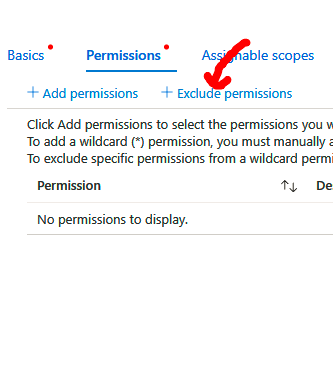
7. Next, we need to exclude this role from starting and shutting down virtual machines. Click on the Exclude permissions button and search for Virtual machines again, and then select Microsoft Compute:
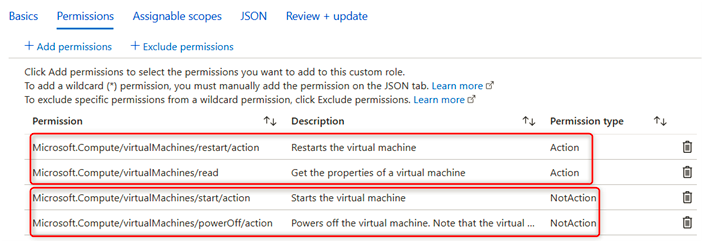
You will notice that the new role now has the following permission types:
- Action: Read the Virtual Machine (VM).
- Action: Restart the VM.
- NotAction: Start the VM.
- NotAction: Shut down the VM.
Click on Next.
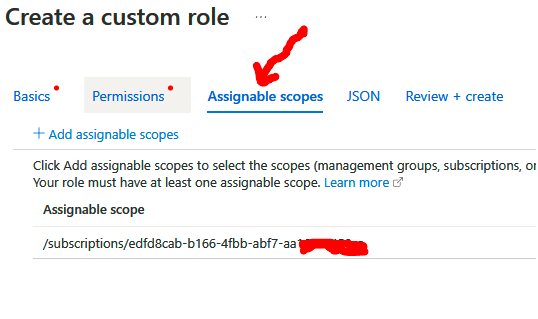
10. Next, we have Assignable scopes, where we can choose where this custom role will be available for assignment. In this scenario, we are going to leave it at the default subscription level that was automatically added and then click on Next:
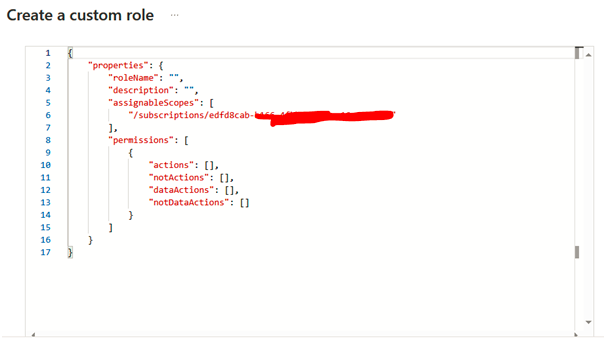
11. Next, we have the JSON tab, which shows the permissions for the new role in JSON format; we also have the ability to download the JSON code. For now, let’s click on Next:
12. The last tab is the Review + update tab, which is a summary of our configuration; click on Create:
13. A new pop-up window will appear, stating that the new custom role has been created and that we can start assigning the role as soon as replication has taken place, which is usually around 5 minutes or less.
In this section, we have created a custom RBAC role via the Azure portal from scratch, which only allows a VM to be restarted and blocks any start or shutdown attempts on a VM.