Users and groups are the primary objects of every Identity Access Management solution, and Azure Microsoft Entra also has a user and group management system, which is the backbone for the access management of identities in the Azure Cloud.
You have seen what an account is; just to refresh what we discussed; an account is an identity that has data associated to it. In Azure Microsoft Entra, you have user accounts and group accounts for managing users and groups. Let’s get started with user accounts and see the operations that are available for administrators.
User Accounts
As the name suggests, user accounts consist of user identities, which will be used by users to log in to services such as Azure, O365, Dynamics 365, SaaS applications, and other third-party applications that are integrated with Microsoft Entra.
Viewing User Accounts
As an administrator, you will be asked to verify if the account exists in Azure Microsoft Entra or get information about a particular user. Hence, knowing how to view user accounts is particularly important in an IT admin’s daily job.
Let’s follow a step-by-step process to view the users in your directory.
1) Open your browser (Microsoft recommends that you use the latest version of your favourite browser) and navigate to the Azure portal, which is available at https://portal.azure.com.
2) A sign-in screen will be presented to you. Sign in using the email address that you used to create the subscription. The data you enter (username and password) will be sent to Azure Microsoft Entra. If the credentials are correct, then you will be logged in.

3) Now that you are in the Azure portal, you can click the hamburger icon at the top-left corner and click Azure Microsoft Entra Directory.
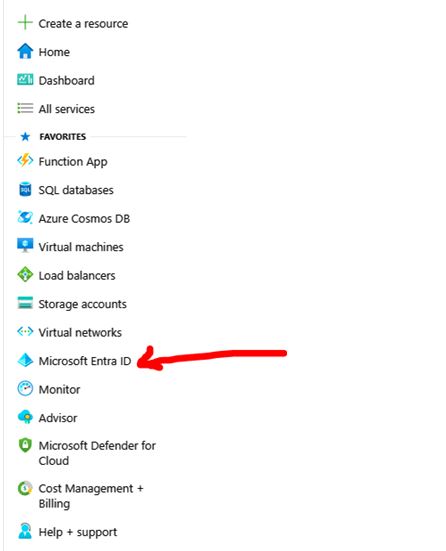
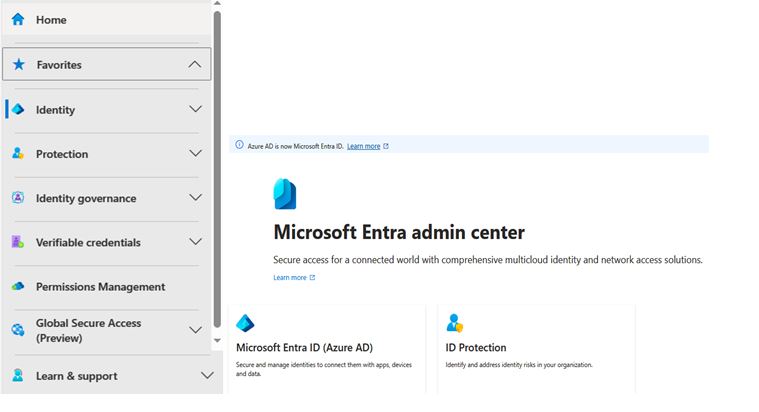
Selecting Microsoft Entra will take you to the Overview blade of Azure Active Directory. This blade gives you some idea about certain aspects of your Azure AD such as the tenant ID, tenant name, primary domain associated to your tenant, edition of Azure AD, and number of users, groups, applications, and devices.
If you scroll down, you will see more information such as your account, Azure AD connect, secure score,etc. The graphic here shows the overview of the tenant that is used for the demonstration.
If you take a close look at the graphic, you can see at the top the option that will let you create, manage, and delete tenants.
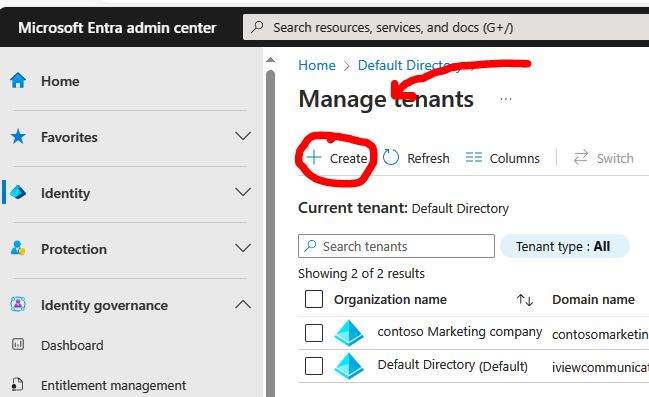
These options are quite useful if you are managing a multi-tenant environment. One thing to note here is that deleting a tenant requires you to cancel all active Azure subscriptions that are part of the tenant.
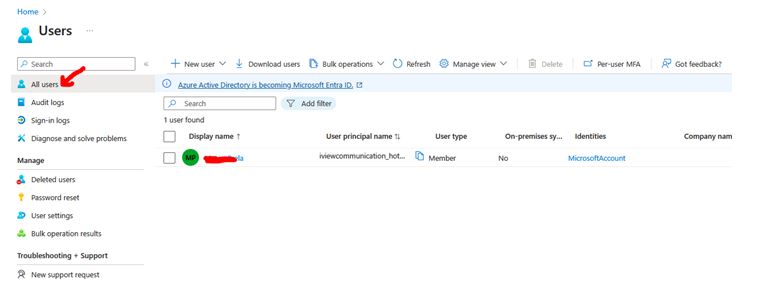
You cannot delete a tenant when there is an active Azure subscription associated with that tenant. Since we are working on user management, let’s shift our focus to the Users blade under the Manage section.
Once you click the Users blade, you will be presented with the All Users view. Your view might be different from what is shown here as it is displaying the users in the demo tenant.
Adding Users
In an enterprise environment, user insertion happens frequently, and cloud administrators are responsible for this. Whenever a new employee joins the organization, administrators are required to create their account, add the necessary licenses, complete their profile, set up their initial password, etc.
There are 3 types of users in Azure AD.
Cloud Identities As the name implies, these are identities that are created in Azure AD and exist only in Azure AD. In the upcoming example, we are going to create a user called John Reed in Azure AD.
This user is going to be a cloud identity as the user will exist only in Azure AD.
Another point to note here is that the user can be part of another Azure AD as in an Azure AD of another organization.
For instance, assume that there is a company abc.onmicrosoft.com with a user called Jane Michael.
Jane Michael can be added to another company’s Azure AD, say, xyz.onmicrosoft.com, through an invitation process also known as business-to-business collaboration.
In this case, Jane Michael is a cloud identity of abc.onmicrosoft.com and she is added to xyz.onmicrosoft.com for collaboration.
When Jane’s account is deleted from her primary directory (abc.onmicrosoft.com), her presence in the other directory is not automatically removed; we have to perform this action manually.
Directory Synchronized Identities
As mentioned earlier, one of the features in Azure AD is that you can synchronize your on-premises Active Directory to Azure AD.
If you have an identity that is synchronized, then you will see Yes in the Directory Synced column for the user in the All Users view.
As mentioned earlier, one of the features in Azure AD is that you can synchronize your on-premises Active Directory to Azure AD.
Guest Users
These are accounts that exist outside of Azure. These include Microsoft accounts (earlier known as Live accounts) or accounts from other identity providers and accounts from other organizations.
These identities are not part of your organizational Azure AD; they need to be invited to your tenant for collaboration.
These accounts will be shown as Guest if you look at the User Type value of the user.
Once the collaboration is no longer required, you can delete these accounts from your user list, and the access will be revoked.
Additionally, we need to keep a couple of points in mind while managing users.
You must be a Global Administrator of the tenant to manage the users.
The Global Administrator role is like a supervisor role and should be granted to users who need to manage all aspects of Azure AD.
There are other roles like User Administrator who can manage the users, but this can be used only for managing non-admin accounts.
While creating a username, the name and password are the only mandatory options.
You have two choices with password. First, you can let the system generate a password for the user. The second option is to bring your own password. In both cases, the user will be asked to change the password during the first sign-in, and as an administrator, you should be finding a way to securely share the password with the new user.
The commonly used method is to email the new user’s manager.
Even though the users can be deleted, you can restore these users within 30 days from the deletion date.
Now let’s create a new user in Azure directory and see what the necessary steps are;
Creating Users in Azure AD
1. Navigate to the All Users blade inside Azure Active Directory.
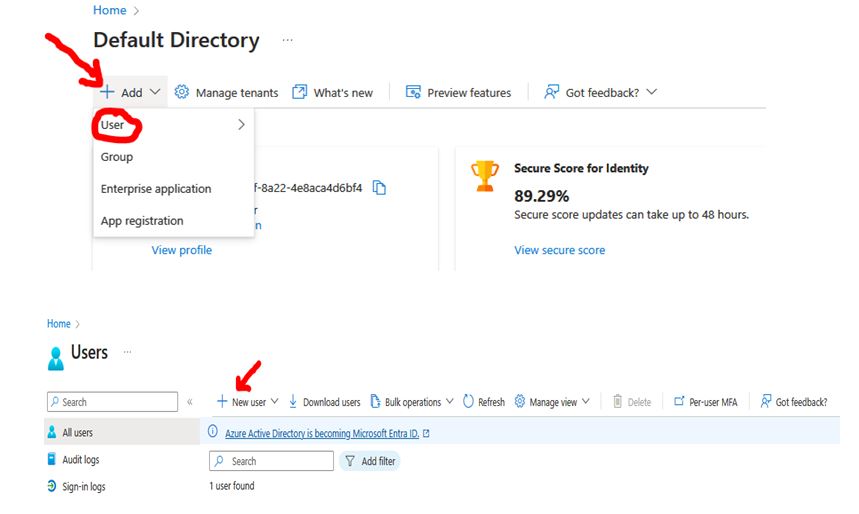
2. Once you are in the All Users blade, you can click the New User option.
3. Selecting New User will display a window to input details of the new user you intend to create. You will be presented with two options, Create User and Invite User.
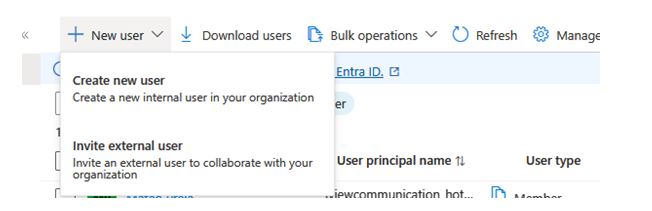
4. Selecting Create new User will help you create a cloud identity that will exist only in Azure directory.
On the other hand, if you select Invite User, you can invite a person from another Azure directory or a person who doesn’t have an Azure AD account (Guest user) via an invitation process.
I will choose Create a new User as our plan is to create a cloud identity user type.
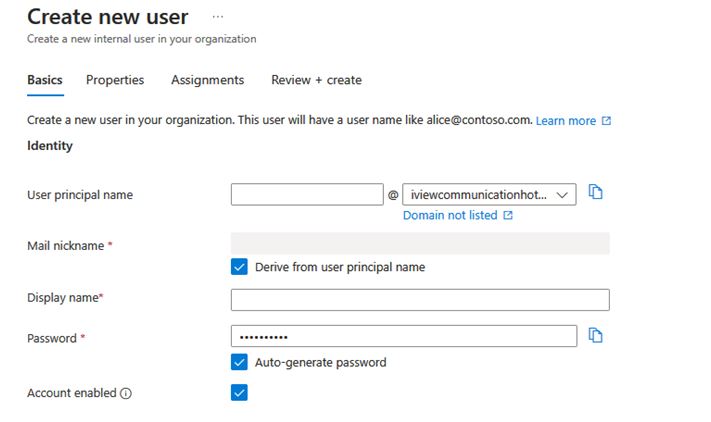
5. Here the User mail, name, and password are the mandatory fields. You can fill in the
fields User principal Name (guest email), Display Name, Department, Job Title, Contact Info, Profile Picture, etc., if you’d like; they are optional. In this graphic, you can see that we have left Password as “Auto-generate password,” which means that the system will generate the password for the user. You can see the password by enabling the Show Password option.
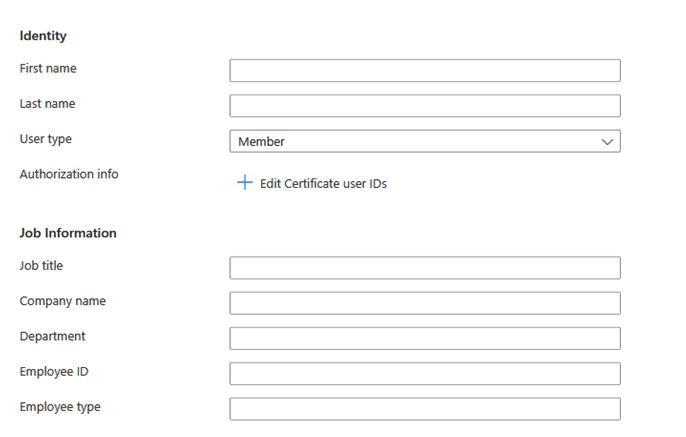
Clicking on Properties you are faced with identity fields of the new user that need to be filled as shown but are not mandatory.
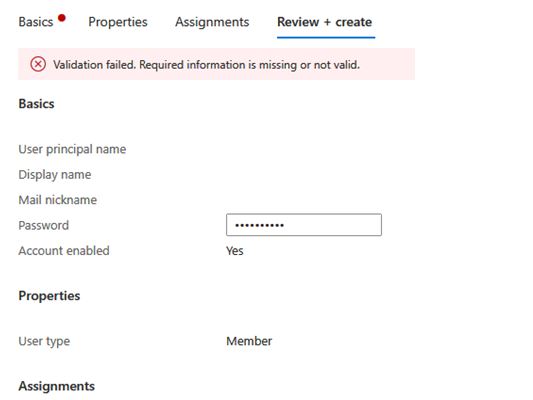
6. Since we have not filled all the mandatory fields, if we click Review+ Create the user, within a couple of seconds, you will get a notification that the validation failed, and all the required information need to be provided.
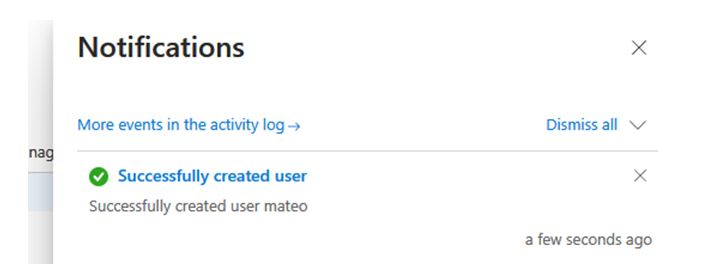
7. Going back to the basics page and complete the entire mandatory field and then confirm validation on Review+ create slide you’ll be notified of the success of the operation as the below example.
Anyhow, your responsibility does not stop here; in your daily tasks you will be asked to delete users when someone leaves the organization, modify user attributes when they move to a different department, or change their location. To give you the idea of how to delete and modify users, let’s head to the next section.